ZS King Quest
Walkthrough in English
| Type | NPC mission |
|---|---|
| Level |
|
| Rewards |
 doll's part  doll's part  doll's part  doll's part  doll's part  doll's part  blessed sceptre  key of numerous locks  orcish maul  headchopper  mystic blade  high warlord's crossbow  glacier robe  glacier kilt  blessed bolt |
Requirements
- Level 130 to start the king’s mission.
- Personally collect all six doll-part chest rewards.
- All six distinct doll parts for the assembly ritual.
- 1 × assembled Doll (source 5271) for the final hand-in.
- Enough free carrying capacity and inventory space for the entire reward.
- A prior quest stage is required (source progress 5262); see the linked mechanism stages.
- A prior quest stage is required (source progress 5672); see the linked mechanism stages.
- A prior quest stage is required (source progress 5281); see the linked mechanism stages.
- First complete: ZS King / Spectre Boots.
- First complete: ZS King / Seal1 — Ritual.
- First complete: ZS King / Seal2 — Ritual.
- Paladin (including the corresponding promotion).
- Spell 112 must not already be known.
- Access Haba in the ZS King's upper room by completing the King quest and passing its quest door.
Items used in this quest
The walkthrough explains which items are obtained during the quest and where components are placed or consumed.
Walkthrough
Show walkthroughStep-by-step instructions, dialogue and highlighted views
Part 1ZS King: Jester Doll / Treasury Access
Before this stage
- Level 130 to start the king’s mission.
- Personally collect all six doll-part chest rewards.
- All six distinct doll parts for the assembly ritual.
- 1 × assembled Doll (source 5271) for the final hand-in.
- 1
At level 130 or above, address the king with hail zs → quest. His greeting keyword is hail zs.
- 2
Recover all six doll parts from the six marked chests in the Old Tomb. Each chest records a separate personal completion flag.
- 3
Return to ZS King: hail zs → pieces of doll. All six personal part flags are required; receiving six parts from someone else does not replace this step.
- 4
Go upstairs. Place the six different doll parts together on marker 2 in View 8, then use the lever at marker 3 in View 8. Pick up the assembled Doll from marker 1 in View 8.
- 5
Return to the king with the assembled Doll: hail zs → jester doll. He consumes the Doll and authorizes his treasury.
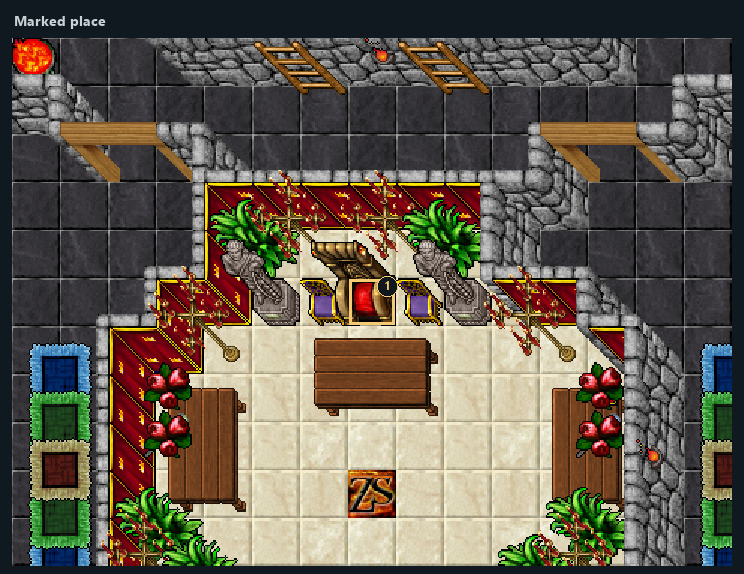
Highlighted places: 1 — ZS King. The area is shown without NPCs or creatures.
- 1ZS King
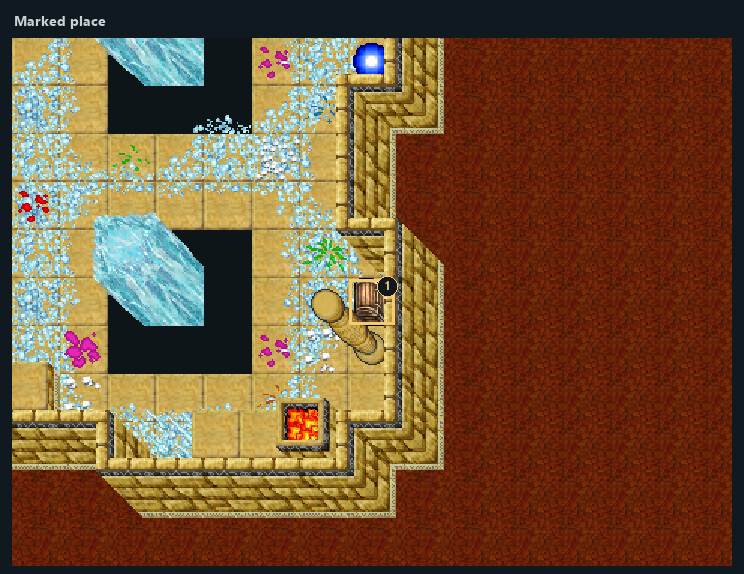
Highlighted places: 1 — Doll part 1.
- 1Doll part 1
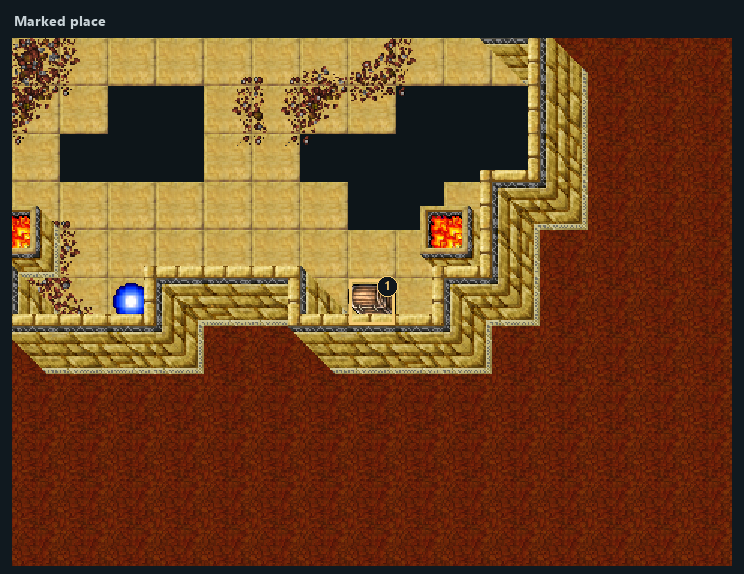
Highlighted places: 1 — Doll part 2.
- 1Doll part 2
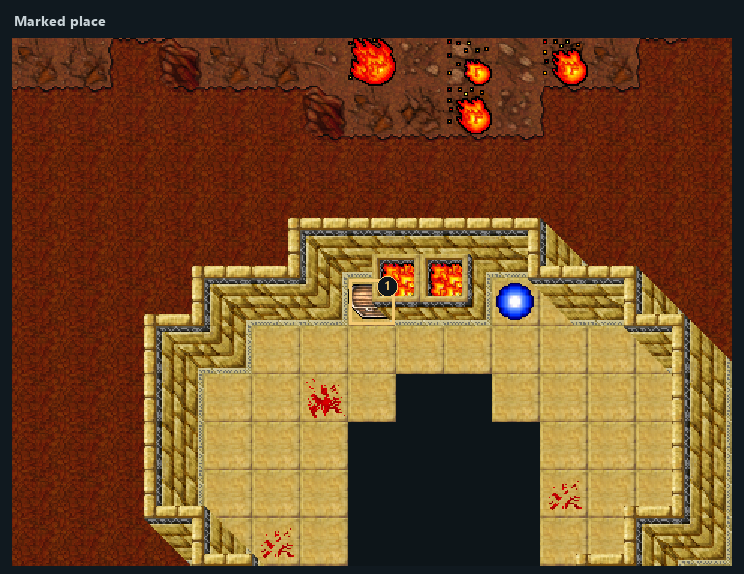
Highlighted places: 1 — Doll part 3.
- 1Doll part 3
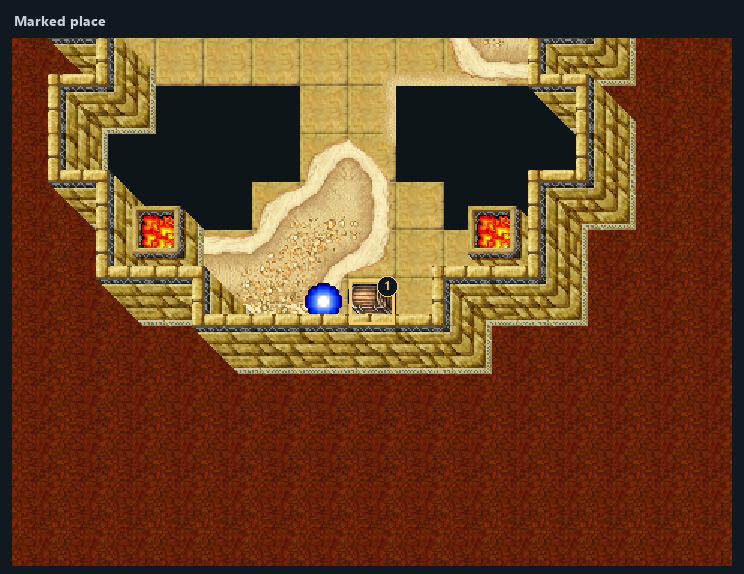
Highlighted places: 1 — Doll part 4.
- 1Doll part 4
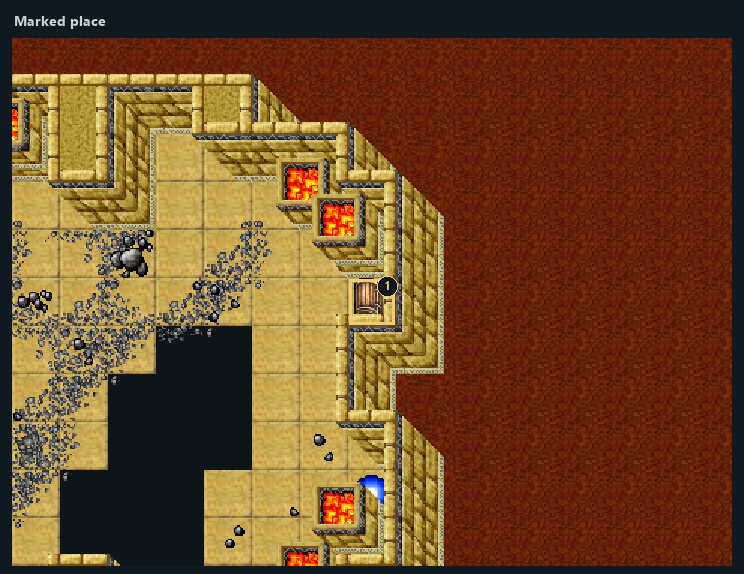
Highlighted places: 1 — Doll part 5.
- 1Doll part 5
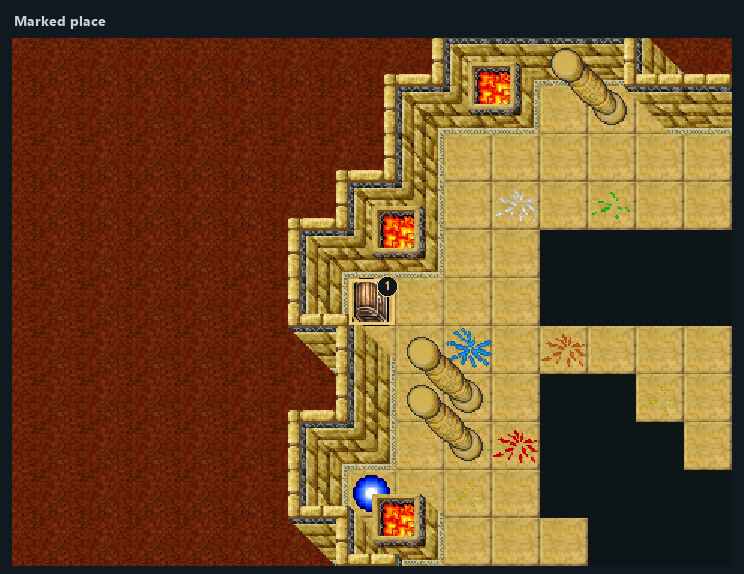
Highlighted places: 1 — Doll part 6.
- 1Doll part 6
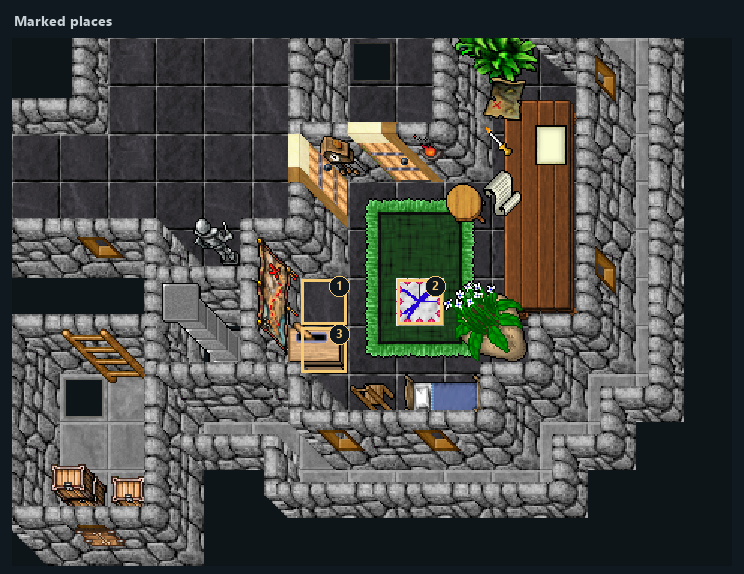
Highlighted places: 1 — Assembled Doll output; 2 — Place all six parts here; 3 — Assembly lever.
- 1Assembled Doll output
- 2Place all six parts here
- 3Assembly lever
Part 2ZS King / 1
Before this stage
- Enough free carrying capacity and inventory space for the entire reward.
- A prior quest stage is required (source progress 5262); see the linked mechanism stages.
- 1
Locate the quest object in the view below. The next instruction identifies its numbered marker.
- 2
At marker 1 in View 2, use the chest (complete the prerequisite stages listed below). Receive 1 × doll's part.
Continue using View 2.
Part 3ZS King / 2
Before this stage
- Enough free carrying capacity and inventory space for the entire reward.
- A prior quest stage is required (source progress 5262); see the linked mechanism stages.
- 1
Locate the quest object in the view below. The next instruction identifies its numbered marker.
- 2
At marker 1 in View 3, use the chest (complete the prerequisite stages listed below). Receive 1 × doll's part.
Continue using View 3.
Part 4ZS King / 3
Before this stage
- Enough free carrying capacity and inventory space for the entire reward.
- A prior quest stage is required (source progress 5262); see the linked mechanism stages.
- 1
Locate the quest object in the view below. The next instruction identifies its numbered marker.
- 2
At marker 1 in View 4, use the chest (complete the prerequisite stages listed below). Receive 1 × doll's part.
Continue using View 4.
Part 5ZS King / 4
Before this stage
- Enough free carrying capacity and inventory space for the entire reward.
- A prior quest stage is required (source progress 5262); see the linked mechanism stages.
- 1
Locate the quest object in the view below. The next instruction identifies its numbered marker.
- 2
At marker 1 in View 5, use the chest (complete the prerequisite stages listed below). Receive 1 × doll's part.
Continue using View 5.
Part 6ZS King / 5
Before this stage
- Enough free carrying capacity and inventory space for the entire reward.
- A prior quest stage is required (source progress 5262); see the linked mechanism stages.
- 1
Locate the quest object in the view below. The next instruction identifies its numbered marker.
- 2
At marker 1 in View 6, use the chest (complete the prerequisite stages listed below). Receive 1 × doll's part.
Continue using View 6.
Part 7ZS King / 6
Before this stage
- Enough free carrying capacity and inventory space for the entire reward.
- A prior quest stage is required (source progress 5262); see the linked mechanism stages.
- 1
Locate the quest object in the view below. The next instruction identifies its numbered marker.
- 2
At marker 1 in View 7, use the chest (complete the prerequisite stages listed below). Receive 1 × doll's part.
Continue using View 7.
Part 8Assemble the Jester Doll
Items used in this stage
- 1
Place doll's part at marker 2 in View 8 (one consumed).
- 2
Place doll's part at marker 2 in View 8 (one consumed).
- 3
Place doll's part at marker 2 in View 8 (one consumed).
- 4
Place doll's part at marker 2 in View 8 (one consumed).
- 5
Place doll's part at marker 2 in View 8 (one consumed).
- 6
Place doll's part at marker 2 in View 8 (one consumed).
- 7
Use the lever at marker 3 in View 8.
- 8
Collect the created doll at marker 1 in View 8.
Continue using View 8.
Part 9Enter the King's Treasury
Before this stage
- A prior quest stage is required (source progress 5672); see the linked mechanism stages.
- 1
Complete the required quest stages, then use the door at marker 1 in View 9.
- 2
Stand directly in front of the door.
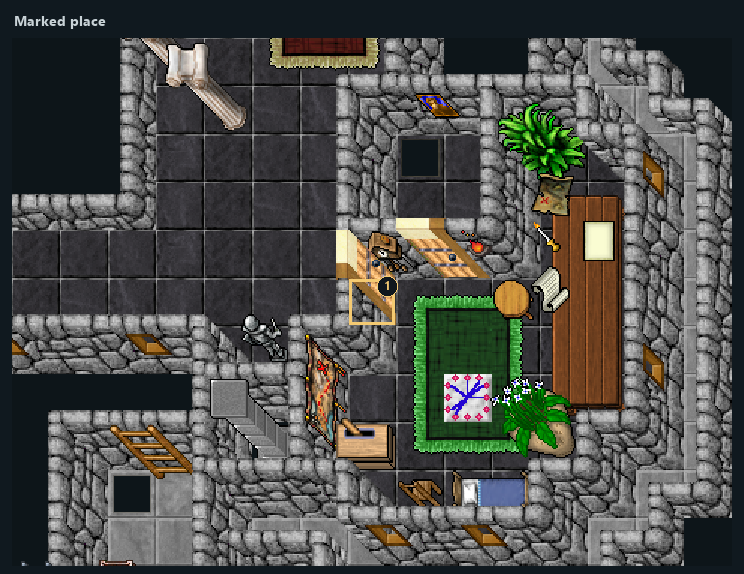
Highlighted places: 1 — Use this mechanism.
- 1Use this mechanism
Part 10Pass the King's Upper Door
Before this stage
- A prior quest stage is required (source progress 5281); see the linked mechanism stages.
- 1
Complete the required quest stages, then use the door at marker 1 in View 10.
- 2
Stand directly in front of the door.
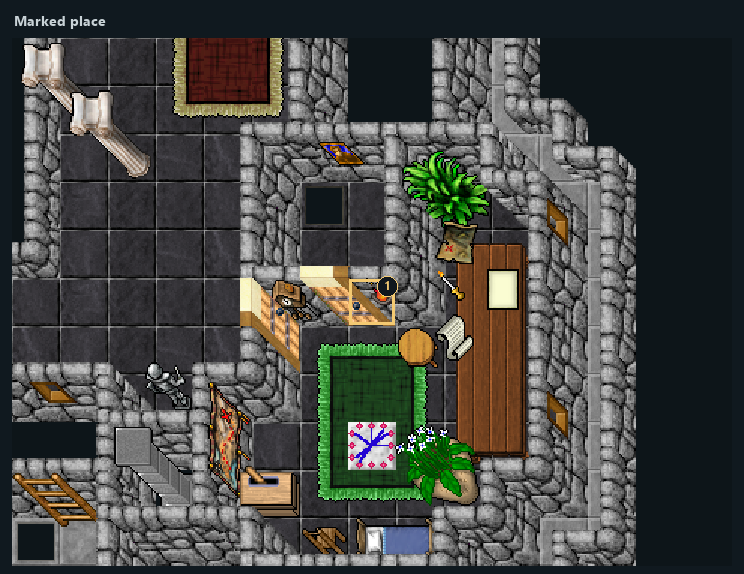
Highlighted places: 1 — Use this mechanism.
- 1Use this mechanism
Part 11Blessed Sceptre and Key of Numerous Locks
Before this stage
- Enough free carrying capacity and inventory space for the entire reward.
- A prior quest stage is required (source progress 5281); see the linked mechanism stages.
- 1
Locate the quest object in the view below. The next instruction identifies its numbered marker.
- 2
At marker 1 in View 11, use the chest (complete the prerequisite stages listed below). Receive 1 × blessed sceptre, 1 × key of numerous locks.
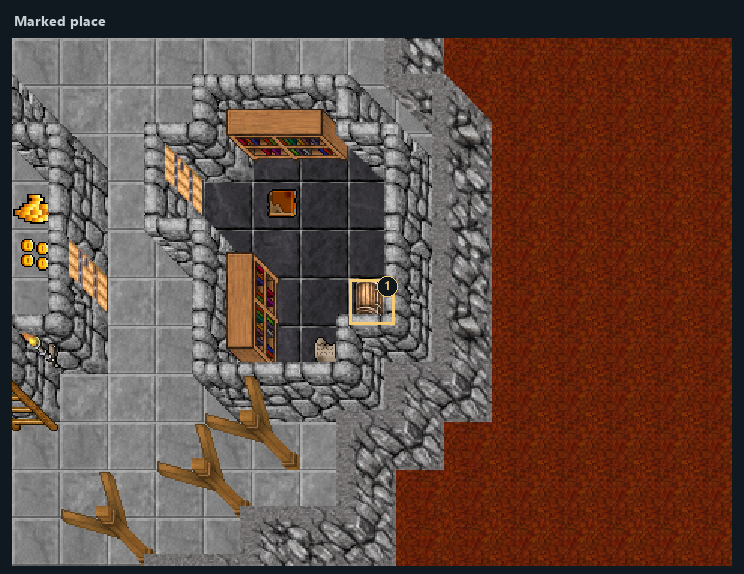
Highlighted places: 1 — Reward 1: blessed sceptre, key of numerous locks.
- 1Reward 1: blessed sceptre, key of numerous locks
Part 12Sacrifice the Key of Numerous Locks
Before this stage
- First complete: ZS King / Spectre Boots.
Items used in this stage
- 1
Place key of numerous locks at marker 2 in View 12 (one consumed).
- 2
Use the lever at marker 1 in View 12.
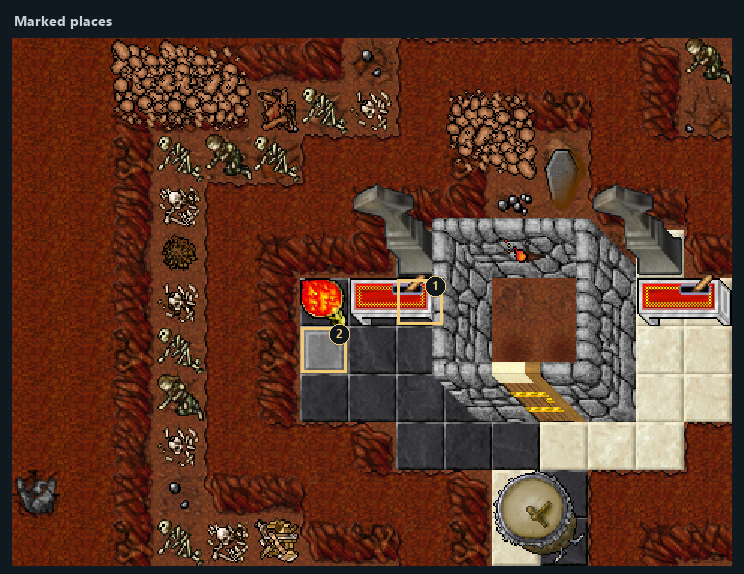
Highlighted places: 1 — Use this mechanism; 2 — Offering: key of numerous locks.
- 1Use this mechanism
- 2Offering: key of numerous locks
Part 13Sacrifice the Blessed Sceptre
Before this stage
- First complete: ZS King / Spectre Boots.
Items used in this stage
- 1
Place blessed sceptre at marker 2 in View 13 (one consumed).
- 2
Use the lever at marker 1 in View 13.
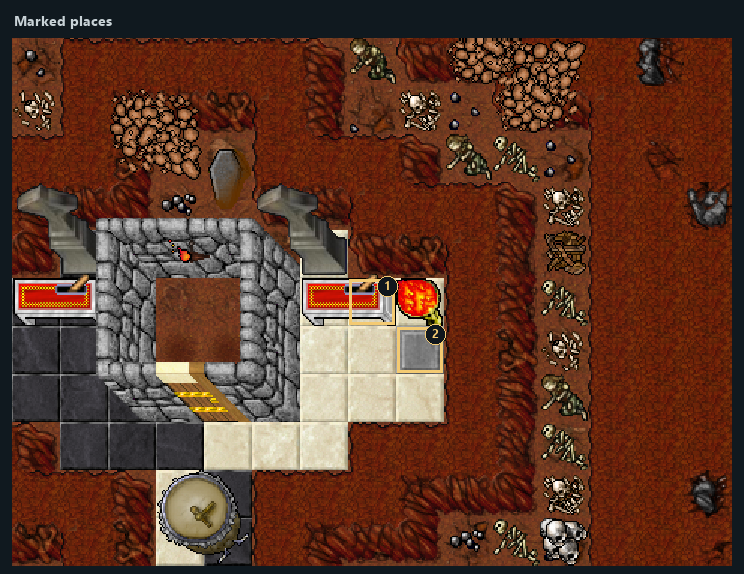
Highlighted places: 1 — Use this mechanism; 2 — Offering: blessed sceptre.
- 1Use this mechanism
- 2Offering: blessed sceptre
Part 14Treasury Drum Passage
Before this stage
- First complete: ZS King / Seal1 — Ritual.
- First complete: ZS King / Seal2 — Ritual.
- 1
Complete the required quest stages, then use the entrance at marker 1 in View 14.
- 2
You are transferred to marker 1 in View 15.
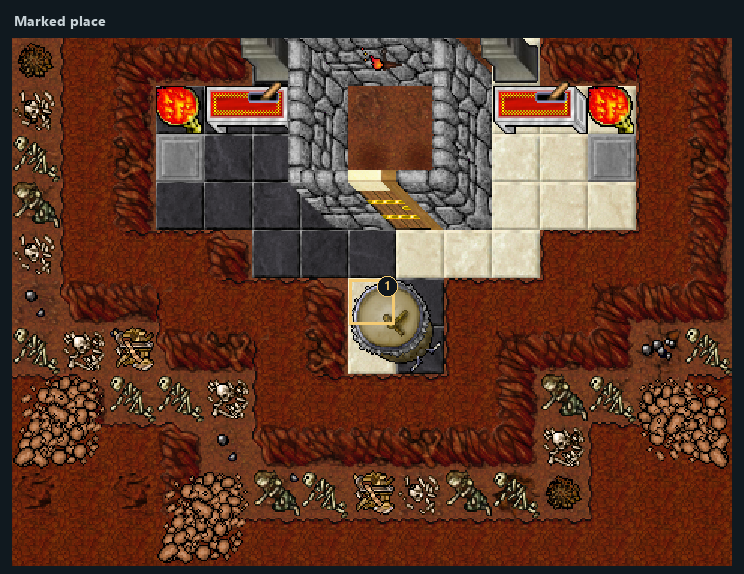
Highlighted places: 1 — Use this mechanism.
- 1Use this mechanism
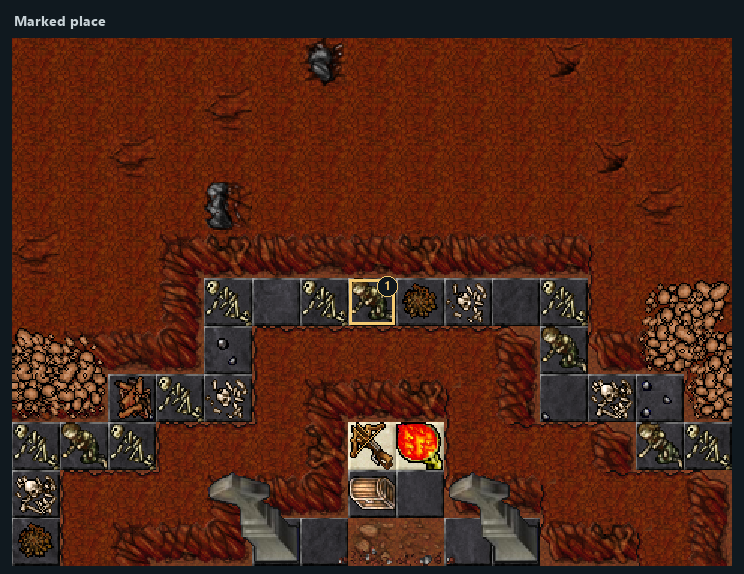
Highlighted places: 1 — Destination.
- 1Destination
Part 15Treasury Drum Passage
Before this stage
- First complete: ZS King / Seal1 — Ritual.
- First complete: ZS King / Seal2 — Ritual.
- 1
Complete the required quest stages, then use the entrance at marker 1 in View 16.
- 2
You are transferred to marker 1 in View 15.
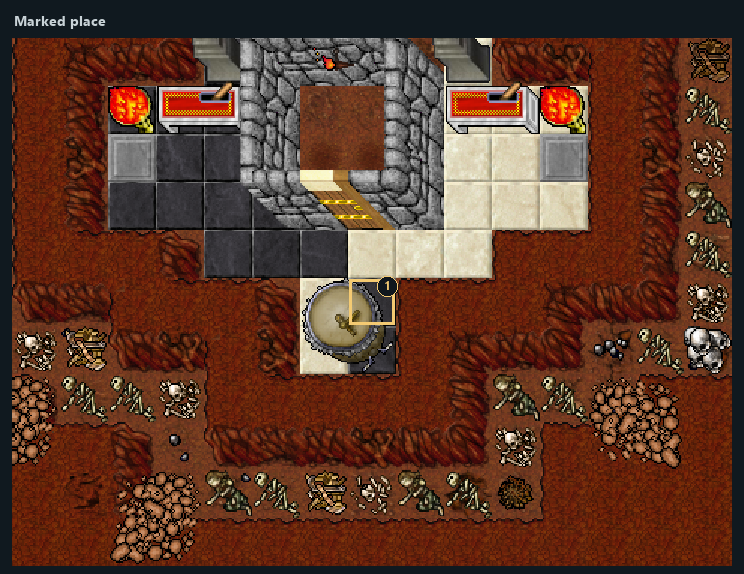
Highlighted places: 1 — Use this mechanism.
- 1Use this mechanism
Continue using View 15.
Part 16ZS King Quest — Final Reward
Before this stage
- Enough free carrying capacity and inventory space for the entire reward.
- First complete: ZS King / Seal1 — Ritual.
- First complete: ZS King / Seal2 — Ritual.
- 1
Locate the quest object in the view below. The next instruction identifies its numbered marker.
- 2
At marker 2 in View 17, use the chest (knight; complete the prerequisite stages listed below). Receive 1 × orcish maul.
- 3
At marker 3 in View 17, use the chest (knight; complete the prerequisite stages listed below). Receive 1 × headchopper.
- 4
At marker 5 in View 17, use the chest (knight; complete the prerequisite stages listed below). Receive 1 × mystic blade.
- 5
At marker 1 in View 17, use the chest (paladin; complete the prerequisite stages listed below). Receive 1 × high warlord's crossbow.
- 6
At marker 4 in View 17, use the chest (sorcerer or druid; complete the prerequisite stages listed below). Receive 1 × glacier robe, 1 × glacier kilt.
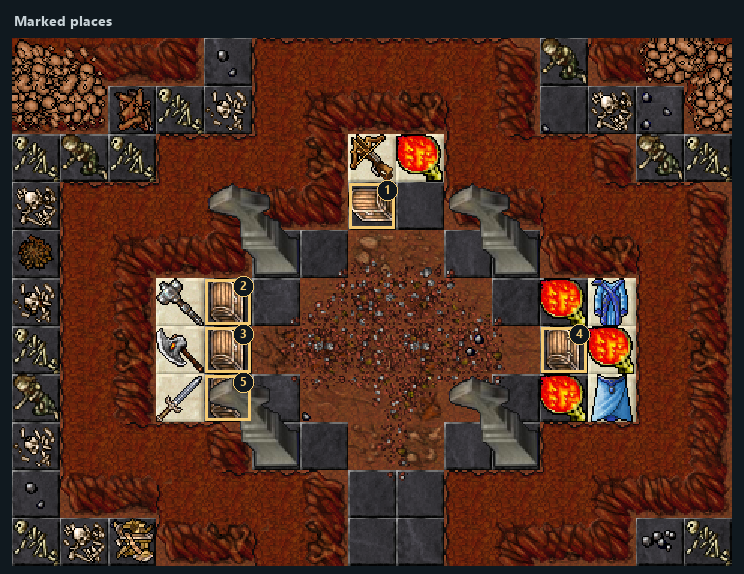
Highlighted places: 1 — Reward 4: high warlord's crossbow; 2 — Reward 1: orcish maul; 3 — Reward 2: headchopper; 4 — Reward 5: glacier robe, glacier kilt; 5 — Reward 3: mystic blade.
- 1Reward 4: high warlord's crossbow
- 2Reward 1: orcish maul
- 3Reward 2: headchopper
- 4Reward 5: glacier robe, glacier kilt
- 5Reward 3: mystic blade
Part 17Haba: Blessed Bolt
Before this stage
- Paladin (including the corresponding promotion).
- Spell 112 must not already be known.
- 1
Reach Haba at marker 1 in View 18.
- 2
As a Paladin, say
hi → quest. He teaches Blessed Bolt for no gold if you do not already know it. - 3
The words are exevo gran con vis. Learning the spell does not remove its normal casting requirements.
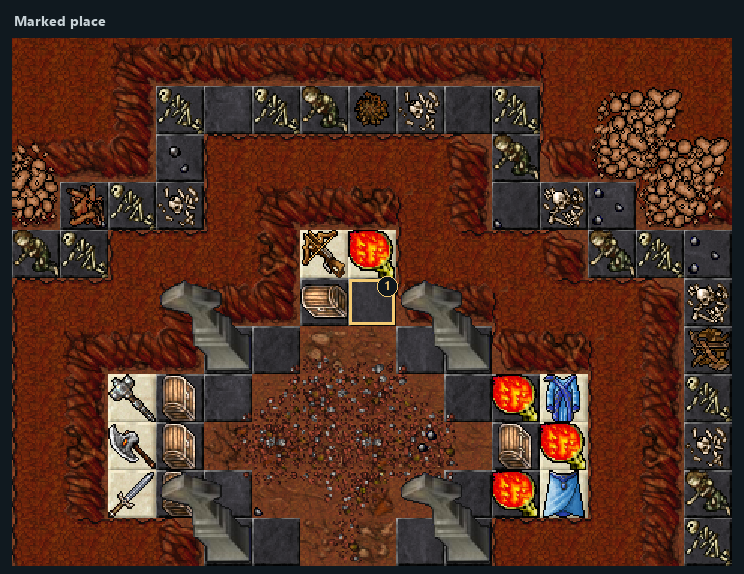
Highlighted places: 1 — Haba. The area is shown without NPCs or creatures.
- 1Haba
Rewards and completion
- Personal permission for the king’s treasury.
- 1 × doll's part
- doll
- 1 × blessed sceptre, 1 × key of numerous locks
- 1 × orcish maul
- 1 × headchopper
- 1 × mystic blade
- 1 × high warlord's crossbow
- 1 × glacier robe, 1 × glacier kilt
- Knowledge of Blessed Bolt: exevo gran con vis.
doll's partdoll's partdoll's partdoll's partdoll's partdoll's partblessed sceptrekey of numerous locksorcish maulheadchoppermystic bladehigh warlord's crossbowglacier robeglacier kiltblessed boltNotes
- Haba is an optional Paladin spell reward inside the king’s reward area; the normal spell requirements remain in force.
- No item hand-in or gold payment in the NPC rule. Reaching the NPC may require completing surrounding map mechanisms; inspect the related stages below.